
What is tracked automatically
The plugin pushes standard ecommerce events to window.dataLayer — the same data layer Google Tag Manager reads. You do not have to configure anything on the plugin side; the events fire as customers use the store.
The plugin does not install Google Analytics or Tag Manager for you. It supplies the events; you supply the container.
The events sent
| Event | Fires when |
|---|---|
view_item |
A visitor opens a single product page |
add_to_cart |
An item is added to the cart |
remove_from_cart |
An item is removed from the cart |
begin_checkout |
The Checkout button is clicked |
purchase |
The customer returns from a completed order |
Each is pushed in the GA4 ecommerce shape, with ecommerce reset to null immediately before — which stops values from one event leaking into the next, a common source of inflated figures.
viewitem
Fires on a single product page.
{
  event: 'view_item',
  ecommerce: {
    currency: 'USD',
    value: 45.00,
    items: [{
      item_id: 'abc123',
      item_name: 'Blue Dream 3.5g',
      price: 45.00,
      quantity: 1,
      item_brand: 'Northern Lights Co',
      item_category: 'Flower'
    }]
  }
}
Brand and category are included when the product has them.
add_to_cart
{
  event: 'add_to_cart',
  ecommerce: {
    currency: 'USD',
    value: 90.00,          // unit price × quantity added
    items: [{ item_id: 'abc123', item_name: 'Blue Dream 3.5g', price: 45.00, quantity: 2 }]
  }
}
remove_from_cart
The same shape, for the item removed.
begin_checkout
Carries the whole cart:
{
  event: 'begin_checkout',
  ecommerce: {
    currency: 'USD',
    value: 120.00,
    tax: 10.00,
    shipping: 0,
    items: [ /* every item in the cart */ ]
  }
}
purchase
The interesting one, because of how it works. The checkout happens inside an iframe served by AIQ Ecommerce, so the page cannot see the order being completed. Instead:
- At
begin_checkout, the cart’s contents are saved to the browser’s session storage. - When the order completes, AIQ Ecommerce returns the customer to your site with a completion parameter and a transaction ID on the URL.
- The plugin sees those parameters, reads the saved cart back, and fires
purchasewith the real transaction ID. - The saved snapshot is then cleared, so a refresh cannot fire a duplicate.
{
  event: 'purchase',
  ecommerce: {
    transaction_id: '12345',
    currency: 'USD',
    value: 120.00,
    tax: 10.00,
    shipping: 0,
    items: [ /* the items purchased */ ]
  }
}
What this means in practice: purchase is accurate for a normal journey, and it will be missed if the customer closes the tab at the confirmation screen instead of returning, or if their browser blocks session storage. Treat AIQ Ecommerce’s own order reports as the source of truth for revenue, and your analytics as the source of truth for behaviour.
The return parameters
| Parameter | Default name |
|---|---|
| Completion flag | dispense_order_complete |
| Transaction ID | transaction_id |
Developers can rename either if they clash with something else on the site — see Hooks & Extending.
Connecting Google Tag Manager
1. Install the container
Add your GTM container snippet to the site — through your theme, a GTM plugin, or your page builder’s custom code area. Follow Google’s own instructions; the plugin plays no part in this.
Make sure the container loads before the plugin’s scripts. GTM in the <head> is the normal placement and satisfies this.
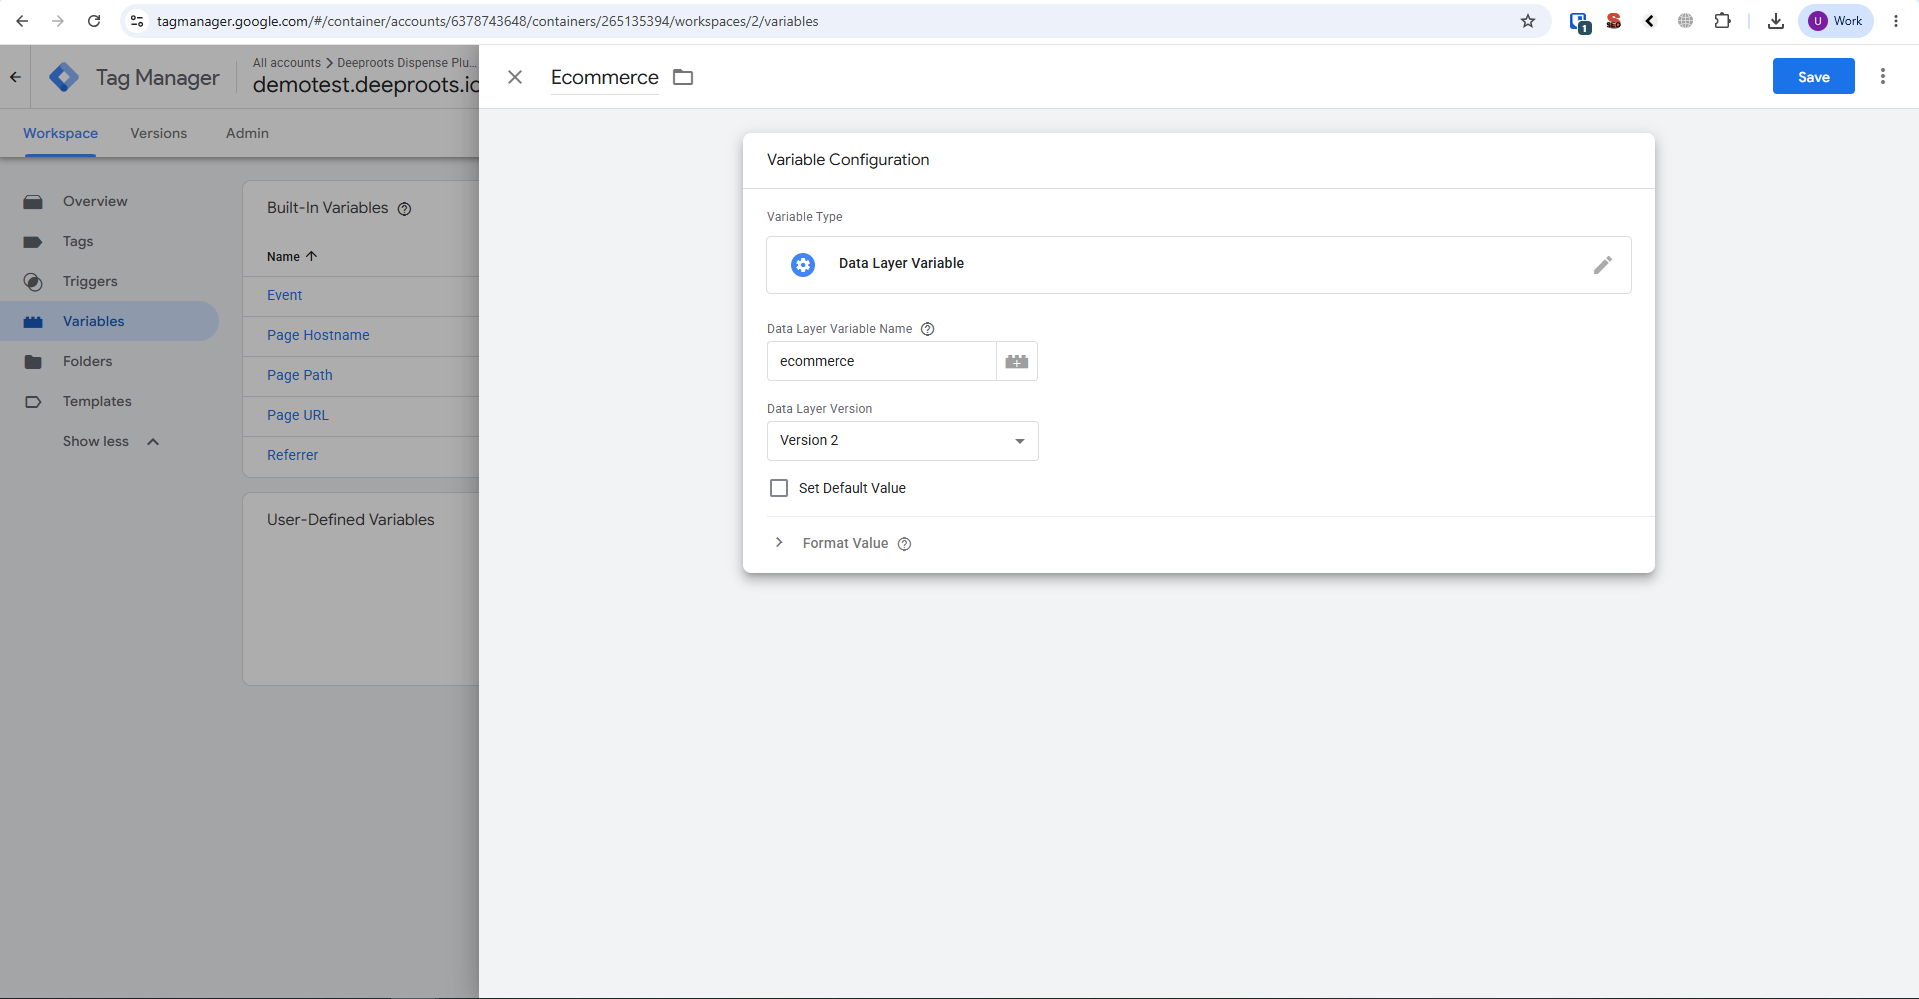
2. Create data layer variables
In GTM, create a Data Layer Variable for each value you want:
| Variable name | Data layer variable name |
|---|---|
| DL - ecommerce | ecommerce |
| DL - currency | ecommerce.currency |
| DL - value | ecommerce.value |
| DL - transaction_id | ecommerce.transaction_id |
| DL - items | ecommerce.items |
3. Create triggers
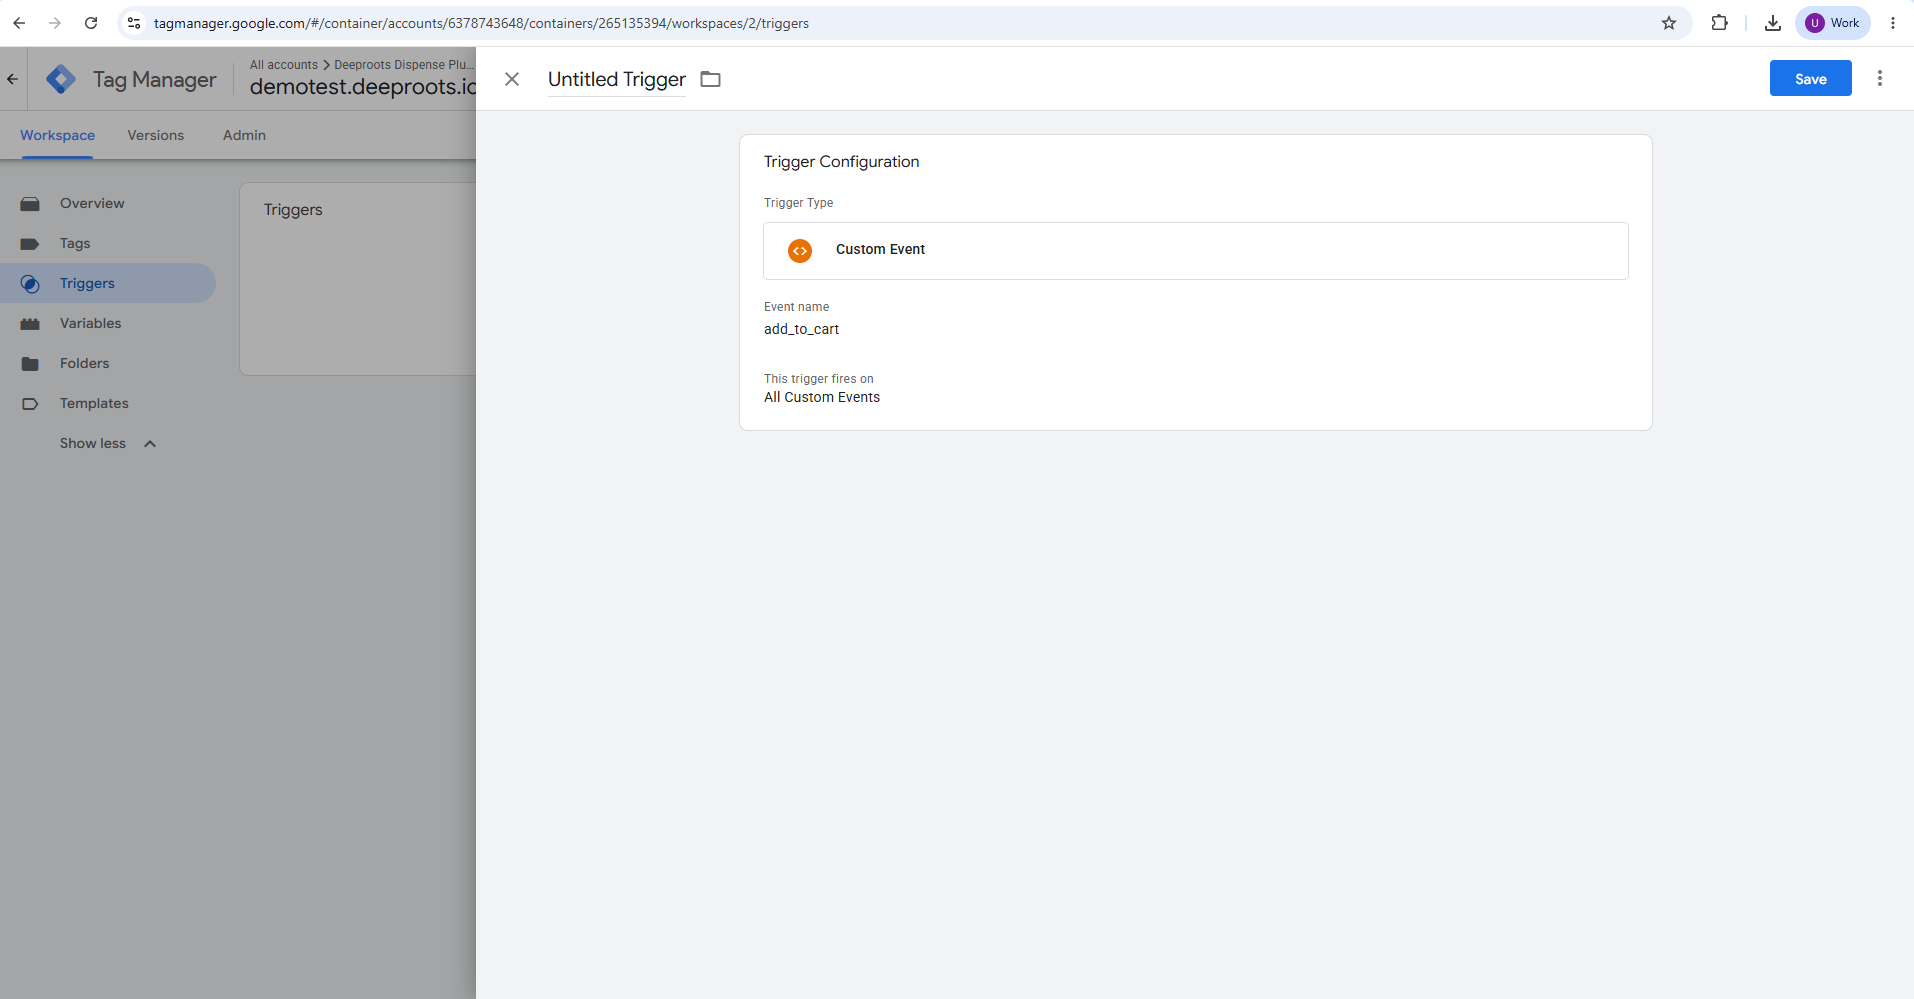
A Custom Event trigger for each event, with the event name matching exactly:
| Trigger | Event name |
|---|---|
| AIQ Ecommerce — View Item | view_item |
| AIQ Ecommerce — Add to Cart | add_to_cart |
| AIQ Ecommerce — Remove from Cart | remove_from_cart |
| AIQ Ecommerce — Begin Checkout | begin_checkout |
| AIQ Ecommerce — Purchase | purchase |
4. Create tags
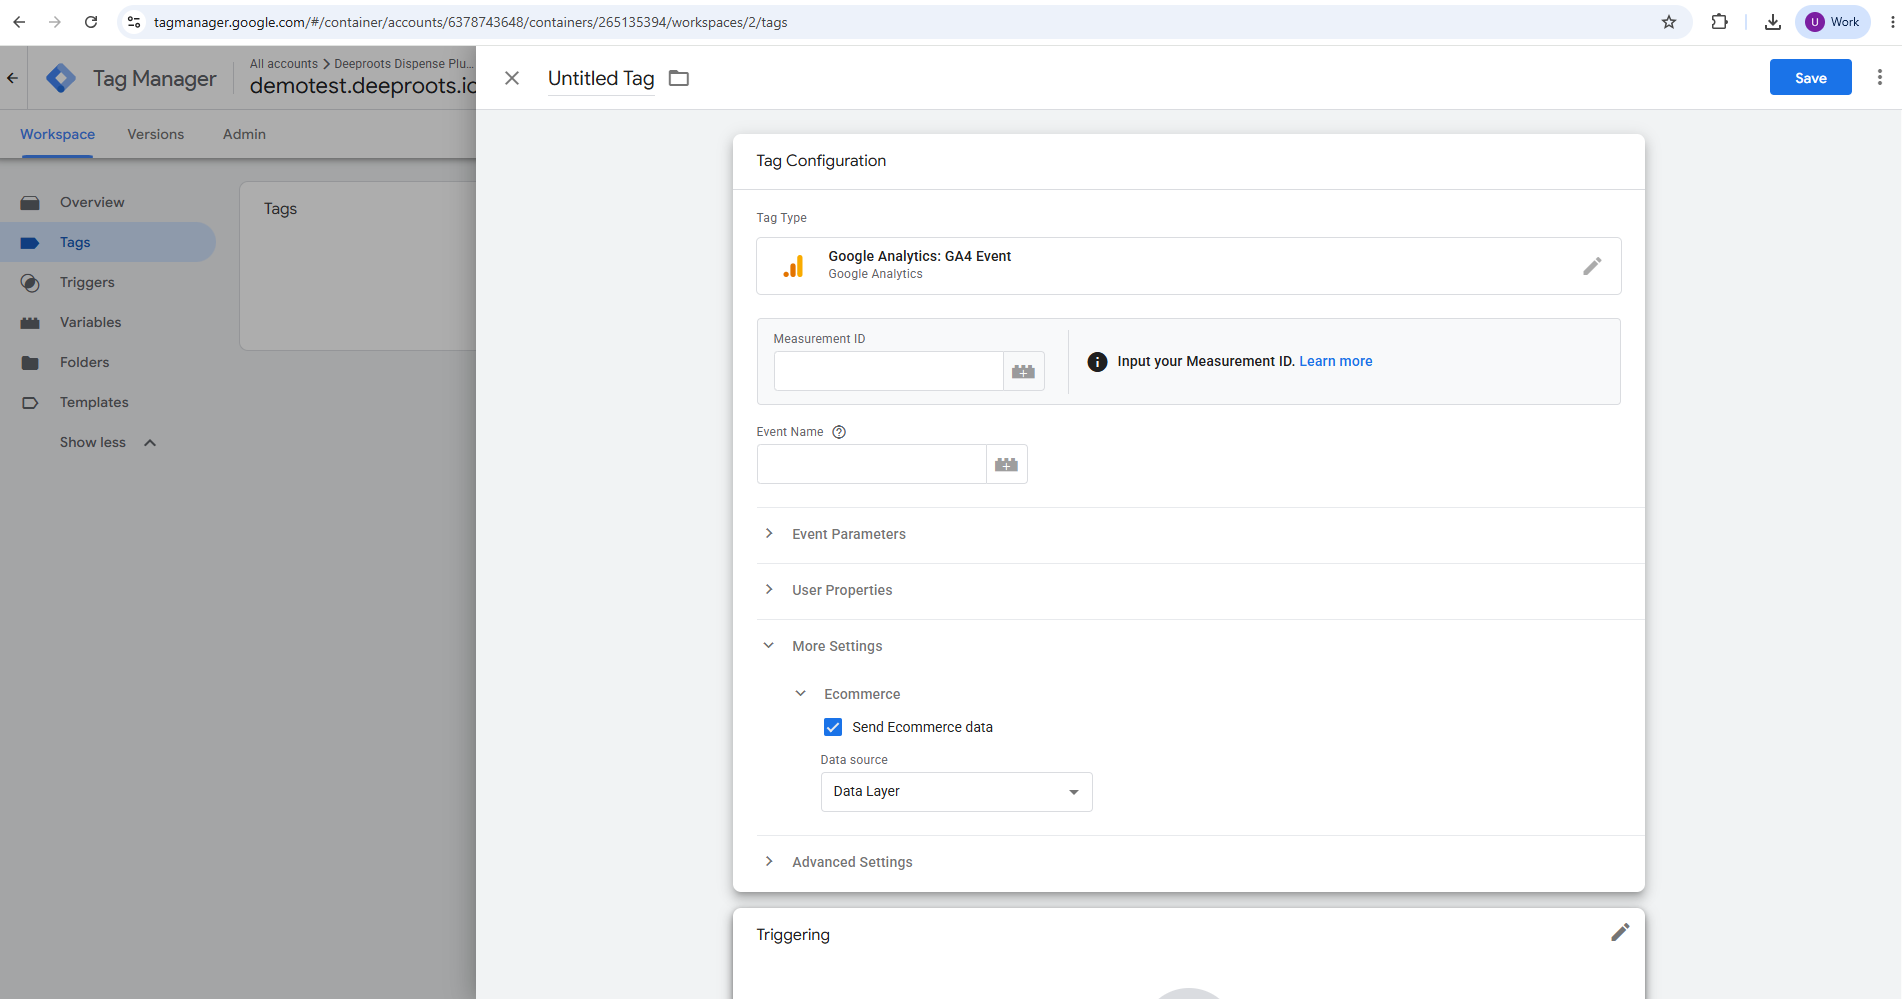
One GA4 Event tag per trigger:
- Configuration Tag — your GA4 configuration tag
- Event Name — the same name (
add_to_cartand so on) - Ecommerce — tick Send Ecommerce data, source Data Layer
5. Preview and publish
Use GTM’s Preview mode, walk through a purchase, confirm every event fires with the right data, then publish.
Connecting Google Analytics 4
With Tag Manager (recommended)
Follow the steps above. GTM sends the events to GA4, and because they use standard GA4 ecommerce names and shapes, GA4’s built-in ecommerce reports populate without further mapping.
Without Tag Manager
If GA4 is installed directly through gtag.js, the events reach it automatically — gtag reads the same data layer. This is simpler but gives you no control over what is sent, and no preview mode.
Marking the conversion
In GA4, go to Admin → Events, find purchase, and mark it as a key event so it appears in conversion reporting.
Reports that populate
Once events are flowing:
| Report | Shows |
|---|---|
| Monetisation → Ecommerce purchases | Products viewed, added and bought |
| Monetisation → Overview | Revenue |
| Engagement → Events | Every event and its count |
| Explore → Funnel exploration | Where customers drop out between view and purchase |
A funnel of view_item → add_to_cart → begin_checkout → purchase is the single most useful thing to build here.
Checking that tracking works
1. The browser console
Open your site, open the browser console, and type:
window.dataLayerYou will see an array of everything pushed so far. Add a product to the cart and look for an add_to_cart entry.
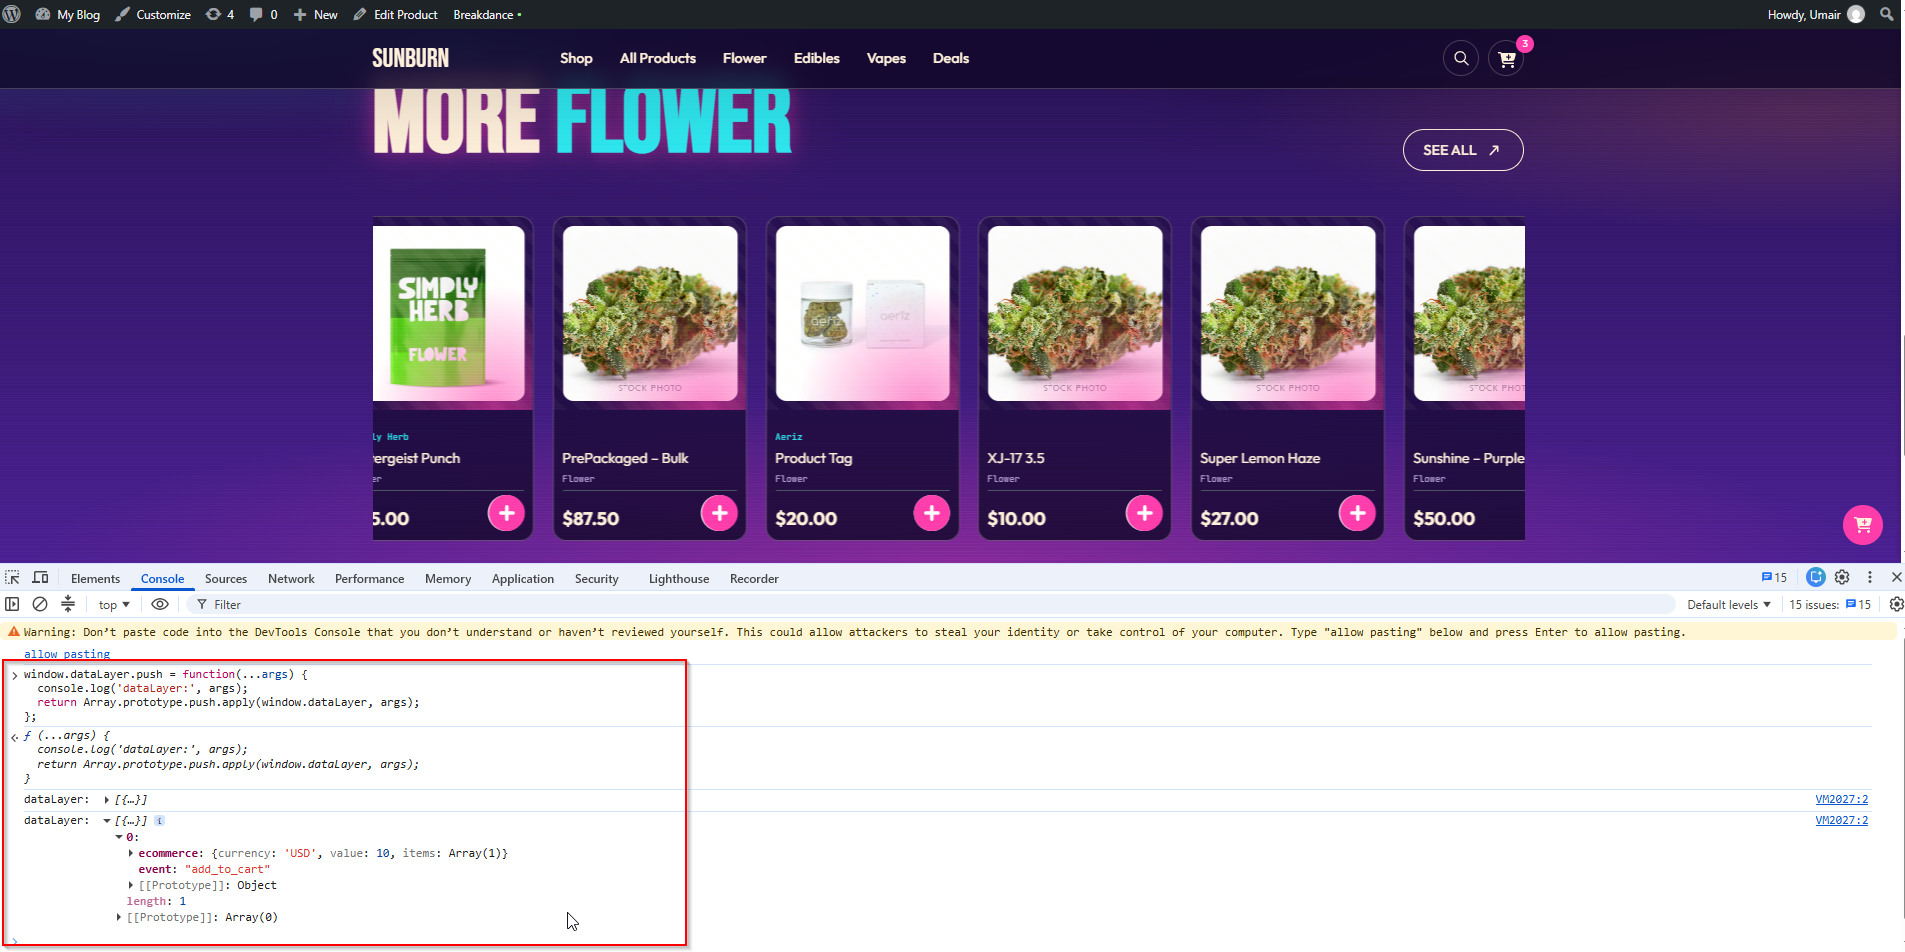
To watch events as they happen:
window.dataLayer.push = function(...args) {
  console.log('dataLayer:', args);
  return Array.prototype.push.apply(window.dataLayer, args);
};
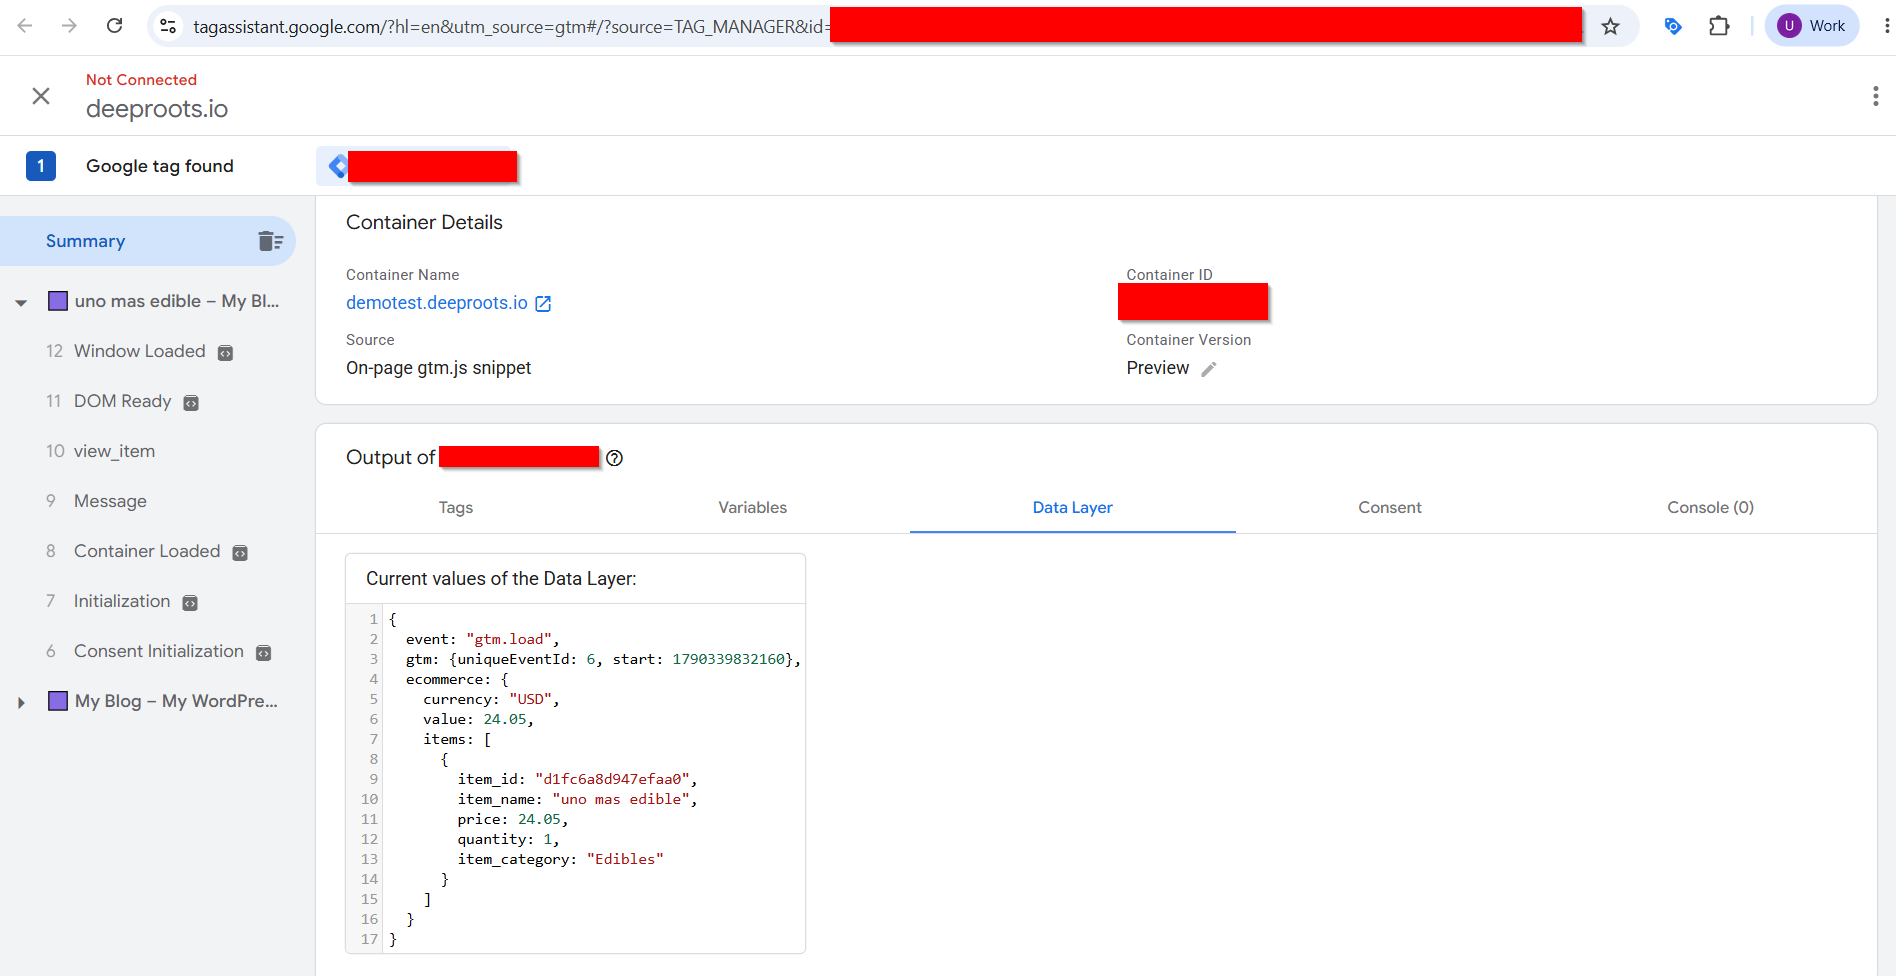
2. GTM Preview mode
In GTM, click Preview and enter your site URL. The debugger lists every event, what fired, and what each variable resolved to. This is the fastest way to find a broken trigger.
3. GA4 DebugView
Admin → DebugView in GA4 shows events arriving in real time while GTM Preview is active. Use it to confirm events genuinely reach GA4, not just the data layer.
4. A full walk-through
Once a quarter, and after any significant change:
- [ ] Open a product page →
view_itemfires with the right product - [ ] Add to cart →
add_to_cartfires with the right quantity and value - [ ] Remove it →
remove_from_cartfires - [ ] Add again and click Checkout →
begin_checkoutfires with the whole cart - [ ] Complete a test order →
purchasefires with a transaction ID - [ ] The transaction ID matches the order in AIQ Ecommerce
- [ ] The revenue figure matches
- [ ] Everything above works on a phone
Common problems
No events at all.
Check Plugin Mode is Full storefront — the cart JavaScript is what emits them. Then check the browser console for a JavaScript error from another plugin stopping the script.
view_item does not fire.
It fires on single product pages, on the dispense_product post type. A custom page showing a product is not the same thing.
purchase never fires.
Check the URL the customer lands on after ordering carries dispense_order_complete. Check no redirect on your site strips query parameters. Check the browser is not blocking session storage — the cart snapshot is stored there.
Purchase revenue does not match AIQ Ecommerce.
Expected to differ slightly. Analytics misses customers who close the tab at the confirmation screen or block storage. Use AIQ Ecommerce for revenue, analytics for behaviour.
Duplicate purchase events.
The snapshot is cleared after firing, so a refresh should not duplicate. If you see duplicates, check GTM is not firing the same tag from two triggers.
Events fire but GA4 shows nothing.
The gap is between GTM and GA4. Use DebugView, check the GA4 Measurement ID, and remember GA4 standard reports lag by up to 24 hours — DebugView and Realtime are immediate.
Values are wrong or carried over between events.
The plugin resets ecommerce to null before each push specifically to prevent this. If it is still happening, another plugin or a custom tag is pushing its own ecommerce data.
Nothing tracks in Sync only mode.
Correct. Track the outbound click to your hosted menu as a link click instead.