
You will need: Elementor Pro. The free version has no dynamic tags and no theme builder, which are exactly the two features this relies on.
Setting up
There is nothing to install or switch on. When Elementor is active, the plugin registers its dynamic tags automatically.
To confirm:
- Edit any page with Elementor.
- Add a Heading widget.
- Click the dynamic tag icon (the small database symbol) beside the Title field.
- Look for a AIQ Ecommerce Products group in the list.
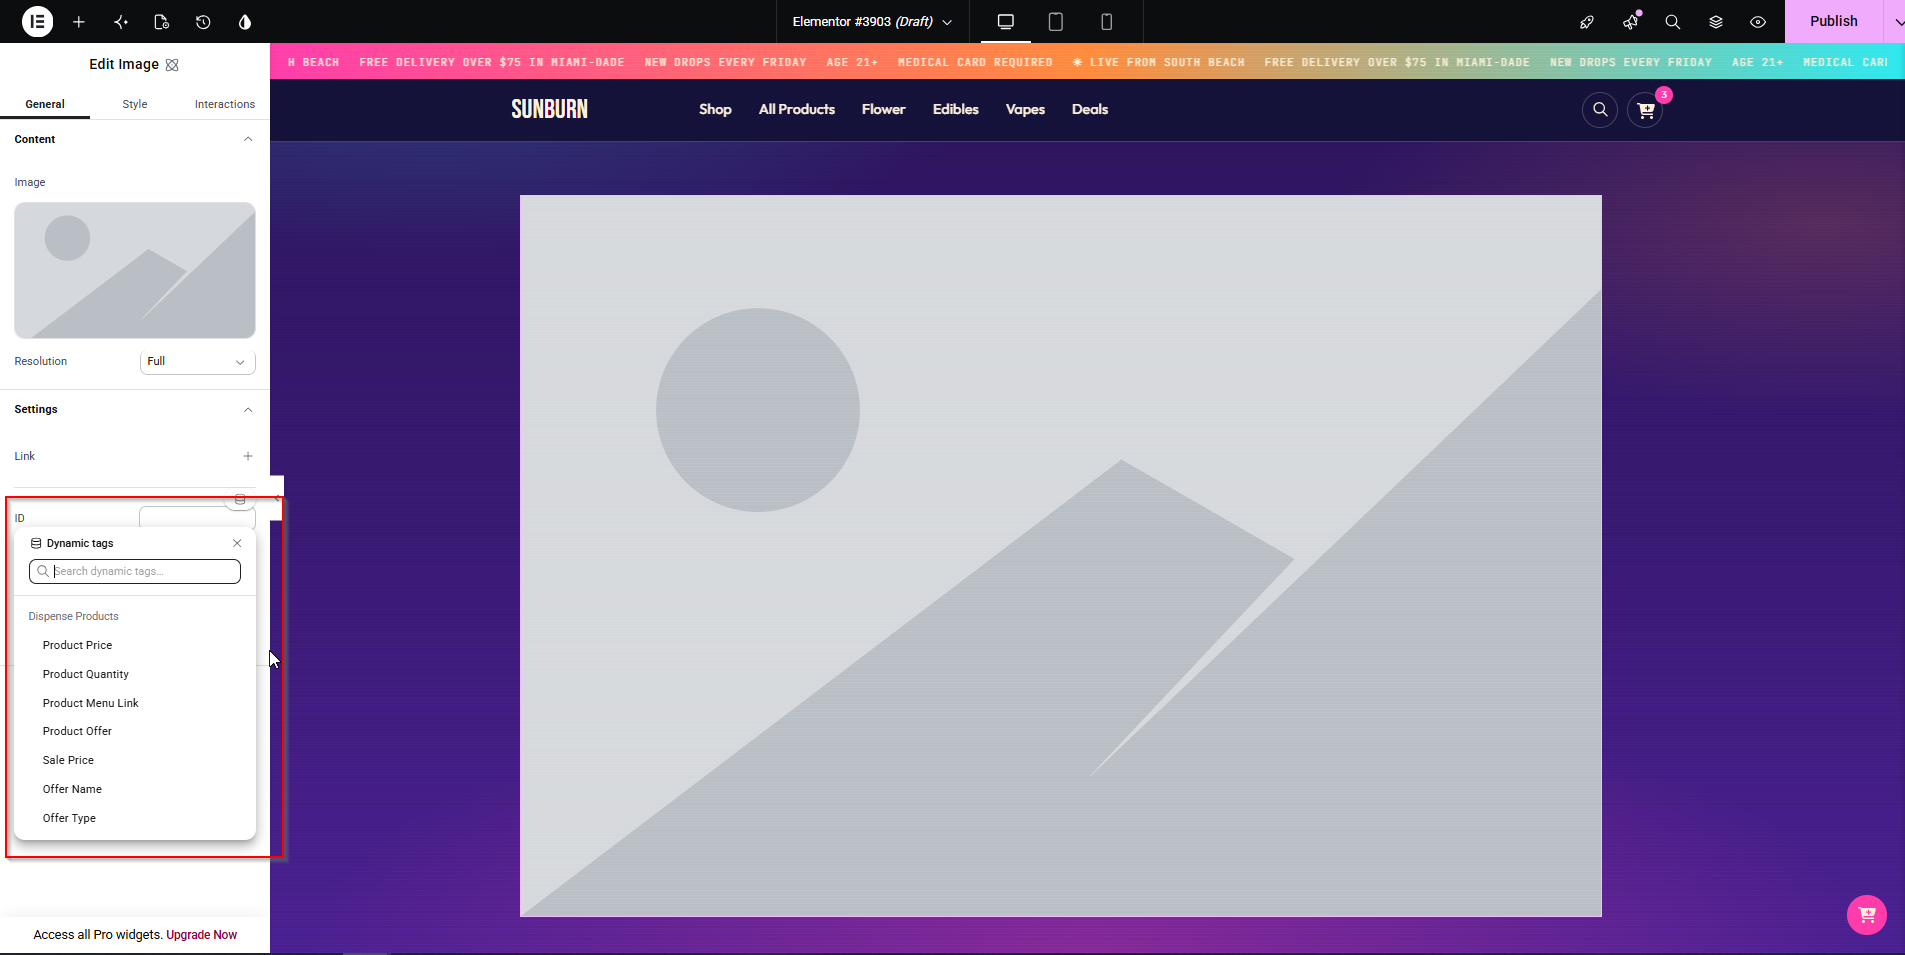
If the group is missing: check Elementor Pro is active, check the AIQ Ecommerce plugin is active, and clear Elementor’s cache at Elementor → Tools → Regenerate CSS & Data.
Available dynamic fields
Product tags
Available on single product templates and inside a loop over dispense_product.
| Tag | Field key | Type |
|---|---|---|
| Price | dispense_product_price |
Text |
| Quantity | dispense_product_quantity |
Text |
| Menu Link | dispense_product_menu_link |
URL |
| Offer Details | dispense_product_offer |
Text |
| Product Sale Price | dispense_product_sale_price |
Text |
Offer tags
| Tag | Field key | Type |
|---|---|---|
| Offer Name | dispense_offer_name |
Text |
| Offer Type | dispense_offer_type |
Text |
| Offer Image | dispense_offer_image |
Image |
These resolve the offer for the current context: the offer archive, a term loop over dispense_offer, or the product’s first assigned offer.
Everything else
Fields not in the list above — the product image URL, the product ID — are still readable through Elementor’s own ACF Field or Post Custom Field dynamic tags, using the field key:
| To show | Use |
|---|---|
| Product image | ACF Field / Post Custom Field → dispense_product_image_url |
| Product ID | ACF Field / Post Custom Field → dispense_product_id |
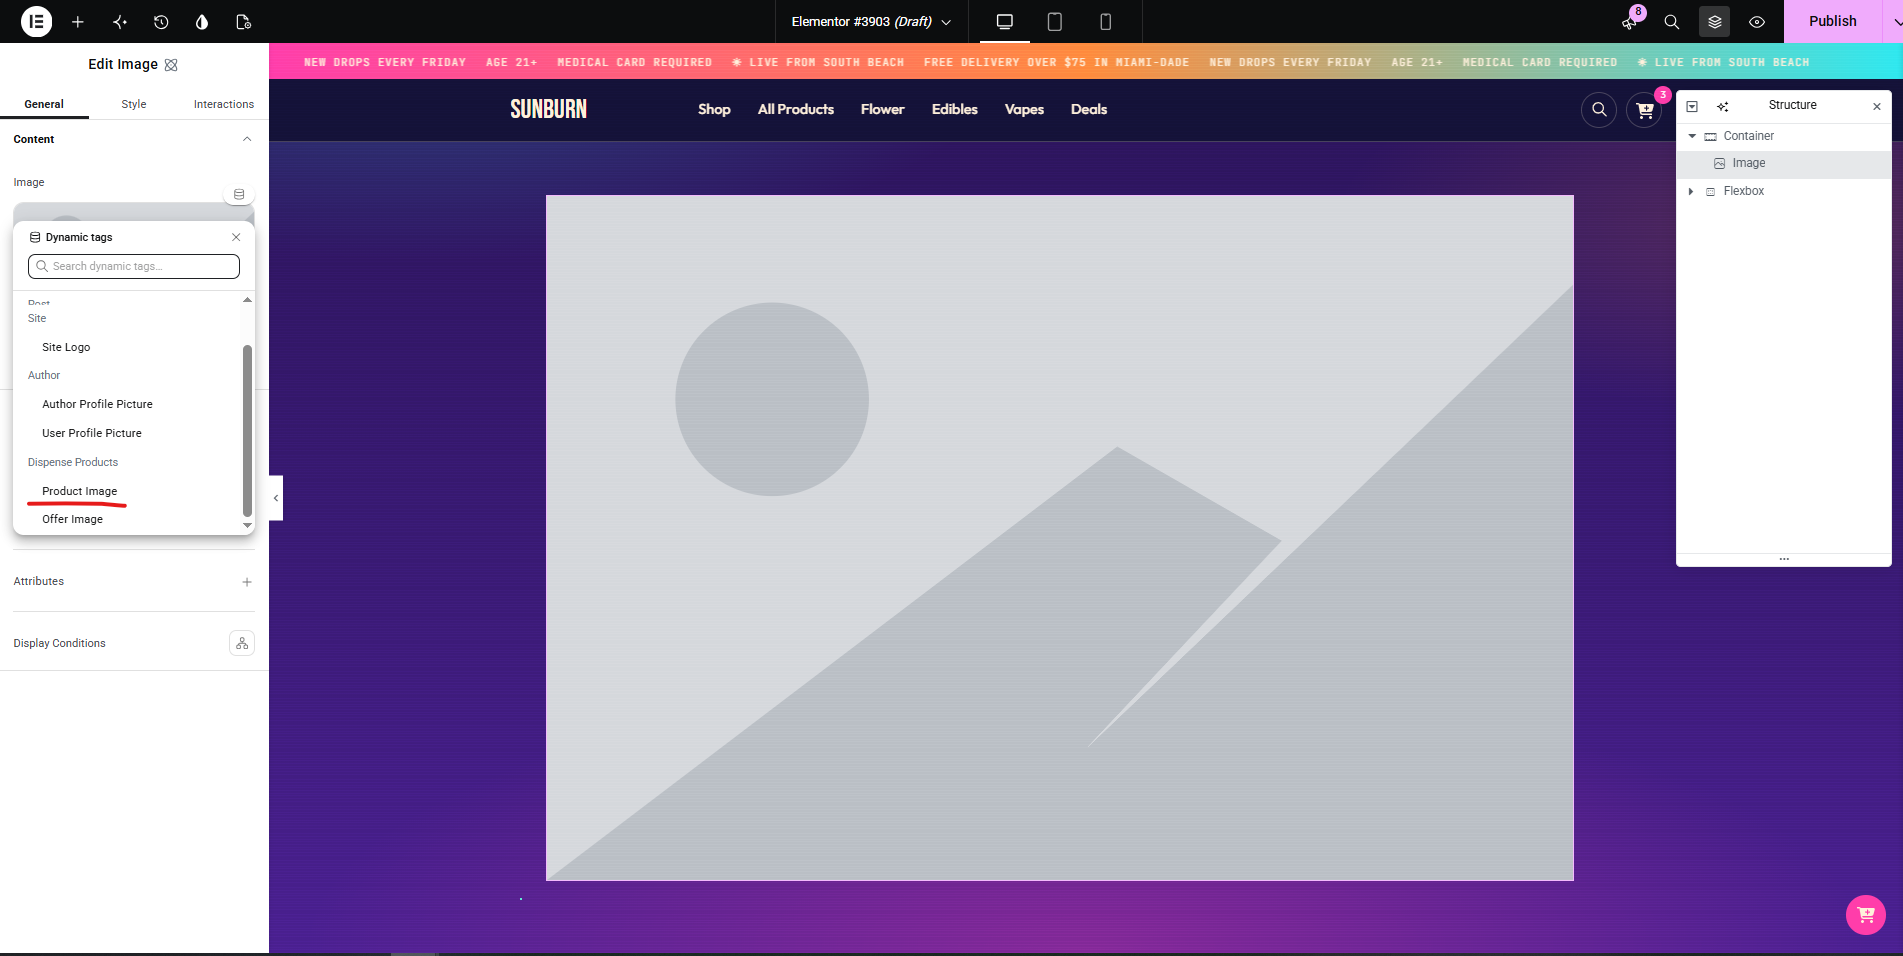
Building a product listing
With Loop Grid (Elementor Pro 3.8+)
The best option — you design one card and it repeats.
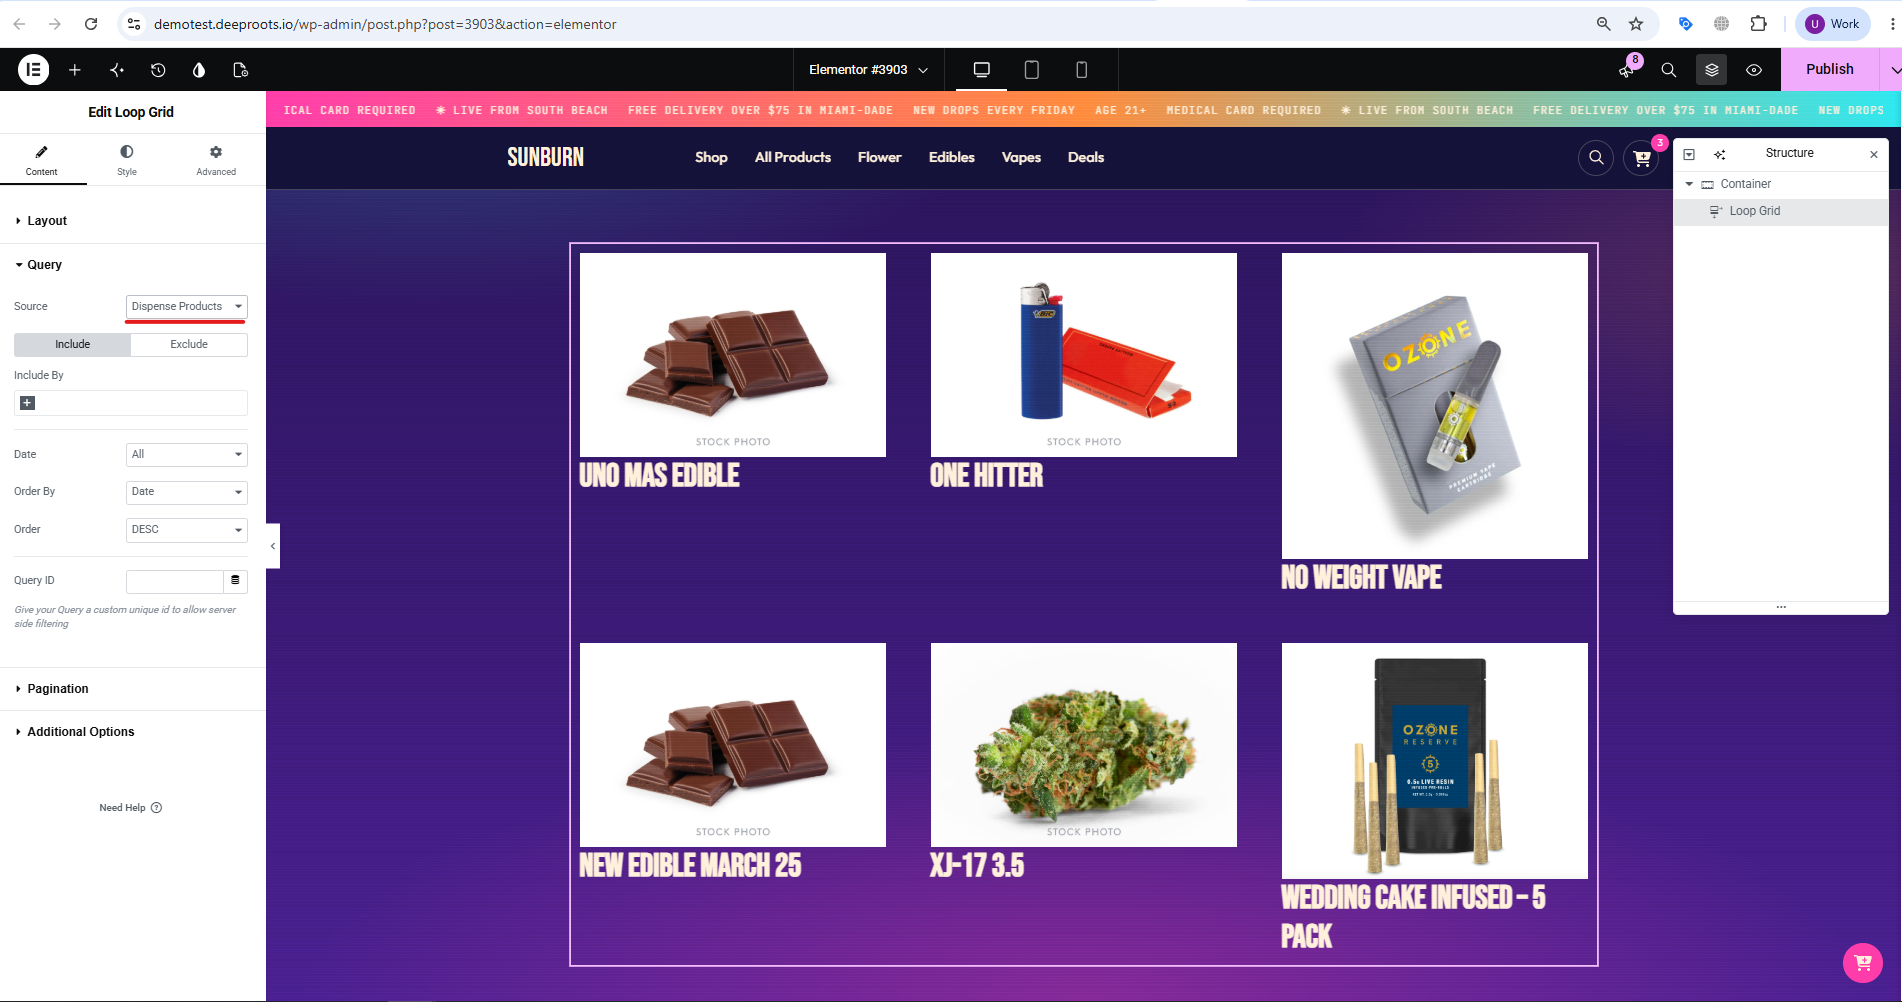
- Add a Loop Grid widget.
- Under Query, set Source to AIQ Ecommerce Product.
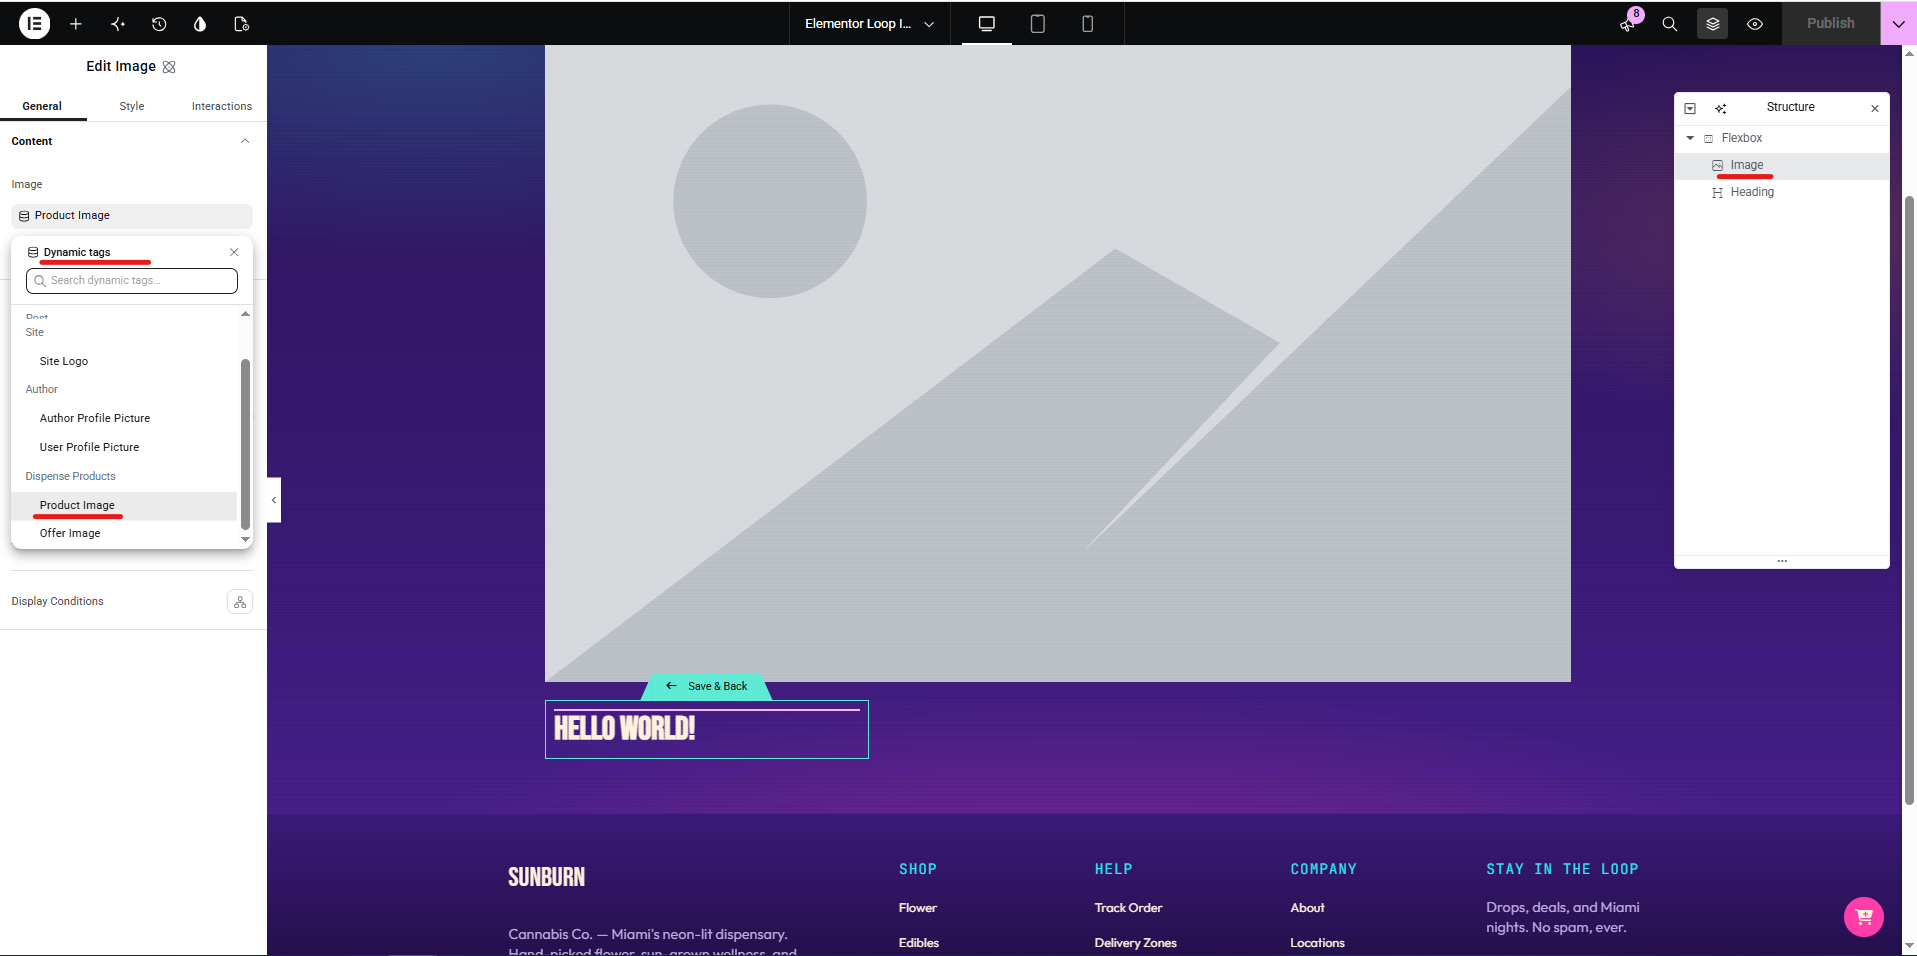
- Click Edit Template to design the card.
- Build the card:
| Element | Content |
|---|---|
| Image | Dynamic → ACF Field → dispense_product_image_url |
| Heading | Dynamic → Post Title |
| Text | Dynamic → AIQ Ecommerce Products → Price |
| Text | Dynamic → AIQ Ecommerce Products → Offer Details |
| Button | Link → Dynamic → Post URL (Full storefront) or AIQ Ecommerce Products → Menu Link (Sync only) |
- Save the template and return to the page.
- Set columns, rows and pagination on the Loop Grid.
Filtering the loop
Under Query → Term, add a taxonomy filter:
| To show | Filter on |
|---|---|
| One category | Category (dispense_category) |
| One brand | Brand (dispense_brand) |
| One location | Venue (dispense_venue_tax) |
| One offer | Offer (dispense_offer) |
| Products on sale | Category → Sale |
On a multi-location site with Universal URLs, filtering by venue is what stops the same product appearing twice.
With the shortcode instead
If you do not have Loop Grid, or you want the plugin’s built-in filters:
- Add a Shortcode widget.
- Enter
[custom_product_filter show_filters="true"].
You get the listing and its filters, styled by CSS rather than in Elementor. See Styling & Branding.
Building a single product page
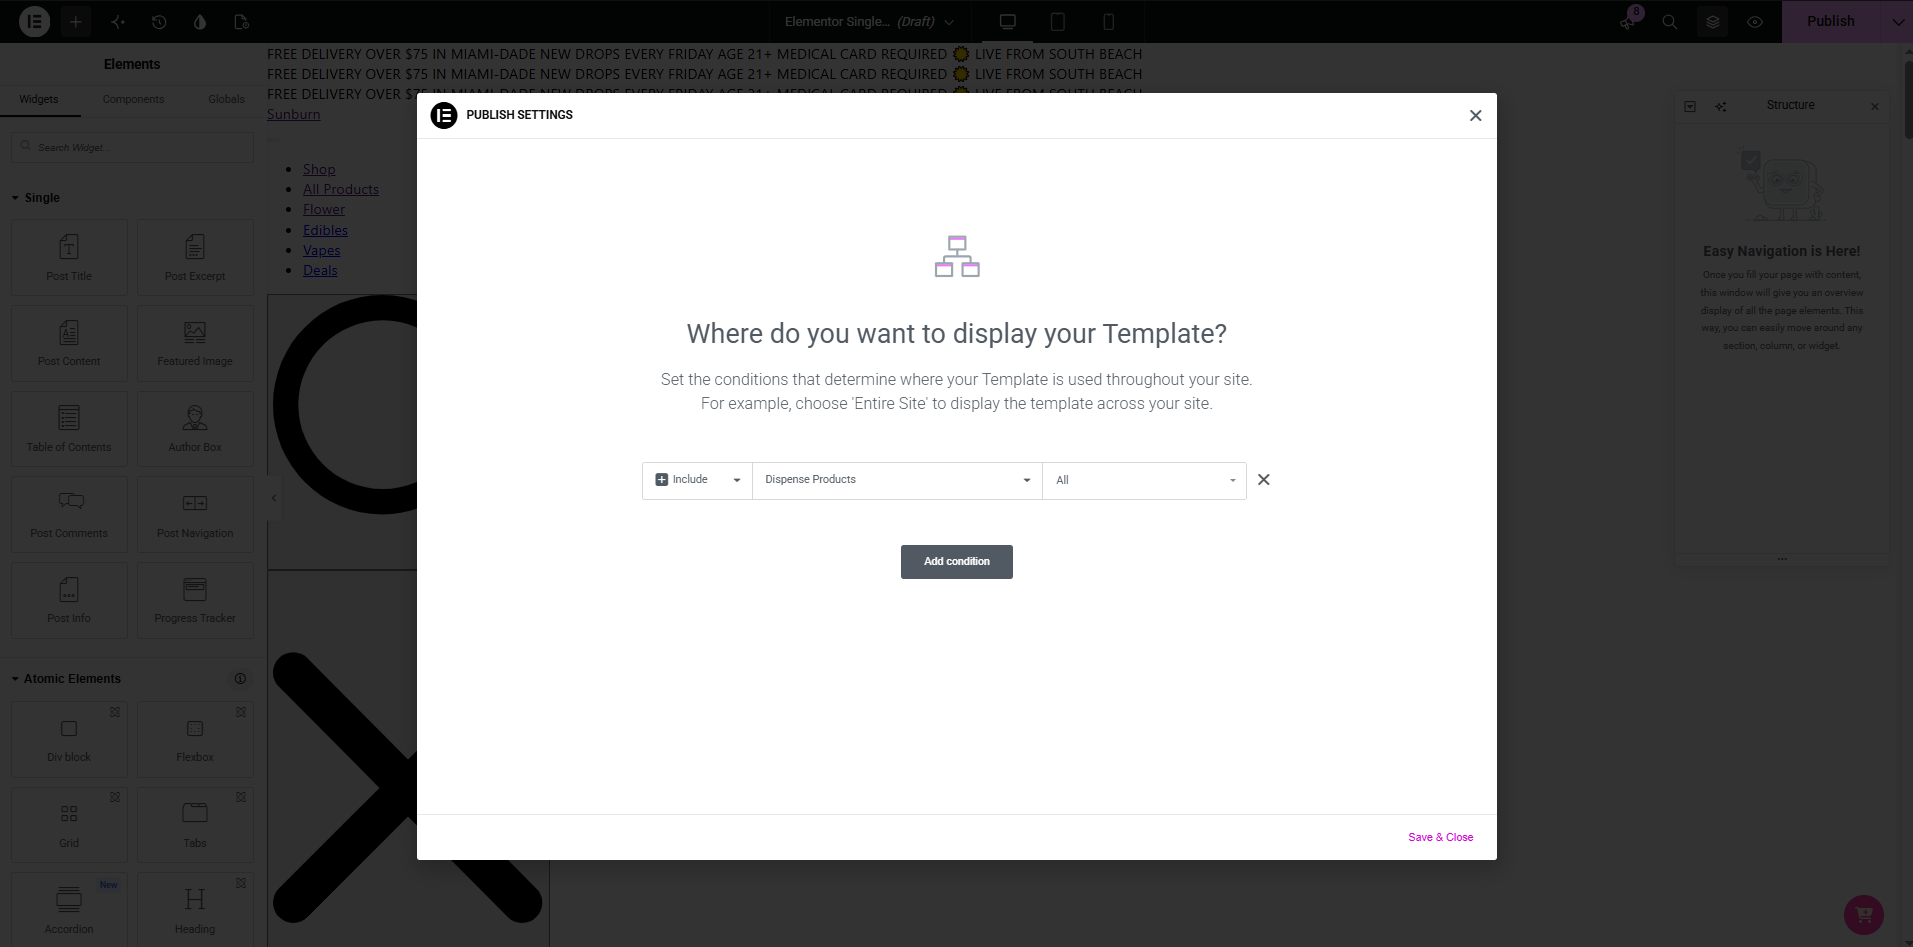
- Go to Templates → Theme Builder → Single Post.
- Click Add New and choose Single Post.
- Set the display condition to AIQ Ecommerce Products.
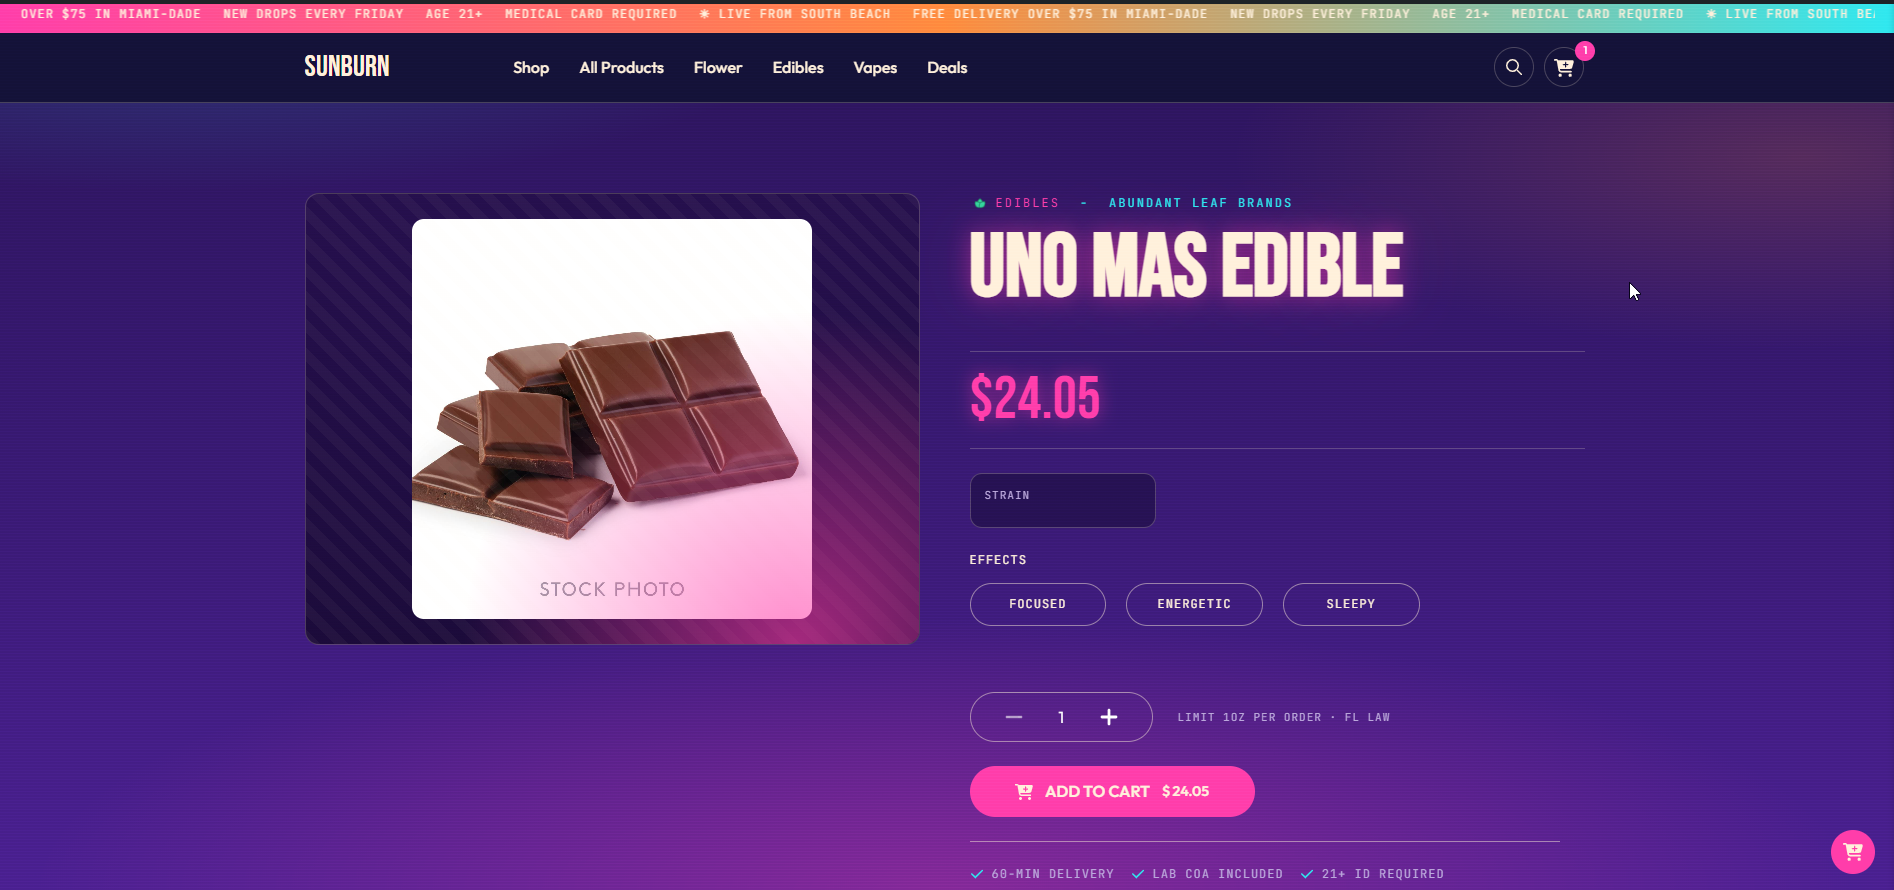
A workable layout
Left column — the image
Image widget → Dynamic → ACF Field → dispense_product_image_url Right column — the details
| Element | Content |
|---|---|
| Heading | Dynamic → Post Title |
| Text | Dynamic → AIQ Ecommerce Products → Price |
| Text | Dynamic → AIQ Ecommerce Products → Product Sale Price (set a conditional so it only shows when filled) |
| Text | Dynamic → AIQ Ecommerce Products → Offer Details |
| Text | Dynamic → AIQ Ecommerce Products → Quantity |
| Shortcode | [dispense_product_cannabis_type] |
| Shortcode | [dispense_product_quantity_buttons] |
| Shortcode | [dispense_add_to_cart] |
Below — the detail tabs
Use a Tabs widget with a Shortcode widget in each pane:
| Tab | Shortcode |
|---|---|
| Description | Dynamic → Post Content |
| Cannabinoids | [dispense_product_cannabinoids] |
| Terpenes | [dispense_product_terpenes] |
| Effects | [dispense_product_effects] |
In Sync only mode
Replace the add-to-cart shortcode with a Button whose link is Dynamic → AIQ Ecommerce Products → Menu Link, labelled something like “Buy on our menu”. The cart shortcodes render nothing for visitors in that mode.
Building offer layouts
An all-offers page
Use the shortcode, not a loop:
- Create a page.
- Add a Shortcode widget.
- Enter
[dispense_offers columns="3" hide_empty="1"].
Then set AIQ Ecommerce Products → API Settings → General → Offers Index Page to that page’s slug and flush permalinks. See Offers & Promotions.
A single offer page
Here the dynamic tags work properly.
- Go to Templates → Theme Builder → Archive.
- Add a new Archive template.
- Set the condition to the Offer taxonomy.
- Build the header:
| Element | Content |
|---|---|
| Image | Dynamic → AIQ Ecommerce Products → Offer Image |
| Heading | Dynamic → AIQ Ecommerce Products → Offer Name |
| Text | Dynamic → AIQ Ecommerce Products → Offer Type |
| Shortcode | [dispense_offer_description] |
- Add an Archive Posts widget below it. It picks up the offer’s products automatically.
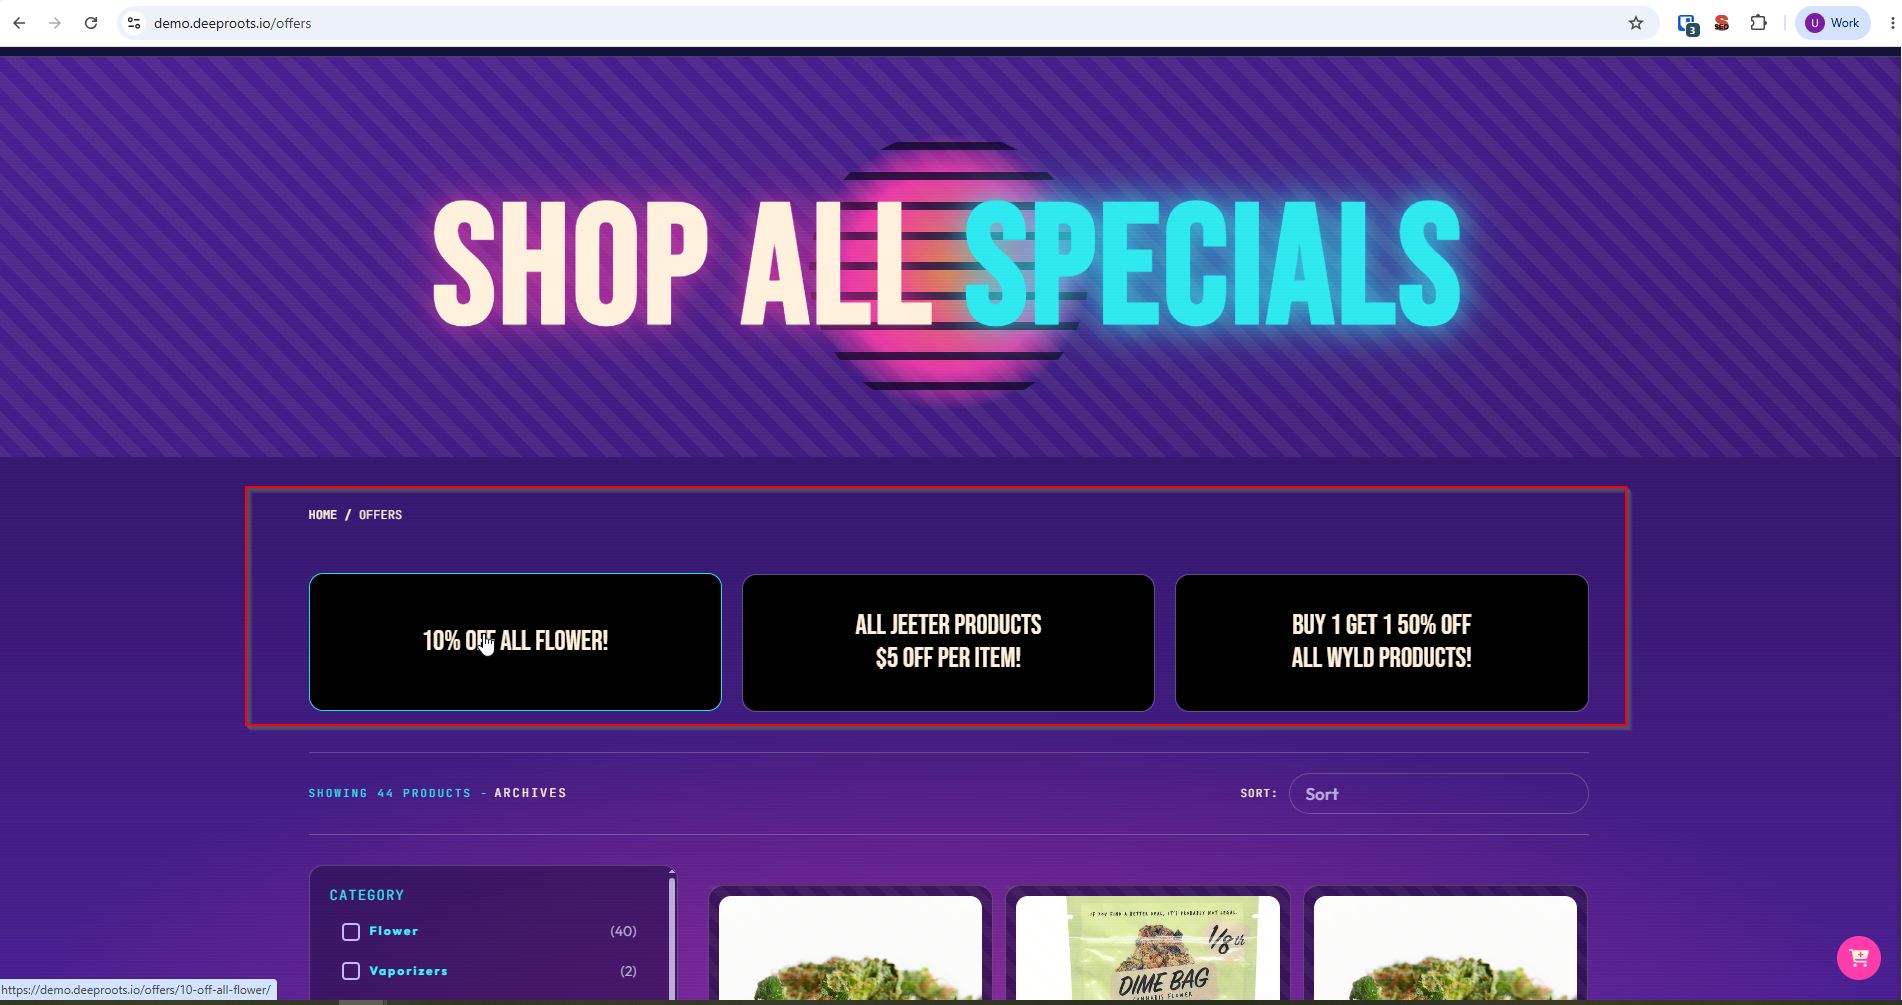
An offer banner elsewhere
On a product page, a Shortcode widget containing [dispense_offer_banner] shows the banner for the product’s first offer. For a specific offer anywhere:
[dispense_offer_banner term_id="17"]Performance notes
Elementor is heavy, and product listings are the place it shows. On large catalogues:
- Keep Loop Grid page sizes modest — 12 to 24 items.
- Keep the loop item template simple. Every widget multiplies by the number of products.
- Enable Elementor’s Improved Asset Loading and Inline Font Icons under Elementor → Settings → Features.
- Prefer the plugin’s shortcode listing over a complex Loop Grid on very large menus.
- Remember that any page using the live detail shortcodes cannot be cached — see Caching & Site Speed.
Common problems
The AIQ Ecommerce Products group is missing from the dynamic tag picker.
Elementor Pro is required. Confirm it is active, then regenerate Elementor’s CSS and data.
A dynamic tag shows nothing.
It has no context. Product tags need a product; offer tags need an offer. On a plain page there is neither, so they resolve empty. Preview inside a template with a real product assigned.
Offer tags are empty in a Loop Grid over offers.
Expected — term loops do not pass their term to custom dynamic tags. Use [dispense_offers].
The product image is missing.
Products have no featured image; the image is a URL in dispense_product_image_url. Bind the Image widget to that field.
Add to Cart does nothing in a loop.
Inside a loop the shortcode needs the product ID: [dispense_add_to_cart product_id="{{acf:dispense_product_id}}"].
My template shows on the wrong post type.
Check the display conditions are set to AIQ Ecommerce Products and not to all singular posts.
Prices are stale on the front end.
Elementor caches rendered CSS and, with some setups, markup. Combine that with a page cache and you can be several syncs behind. Exclude product pages from full-page caching.